Booting the Installer
To install Gallium Standalone, you need to download an installer image from the Gallium Console and boot your server from it.
Download the Installer
- Log in to the Gallium Console.
- Navigate to Deployments → New Deployment → Standalone.
- Under Download Boot Media, choose one of the two available installers:
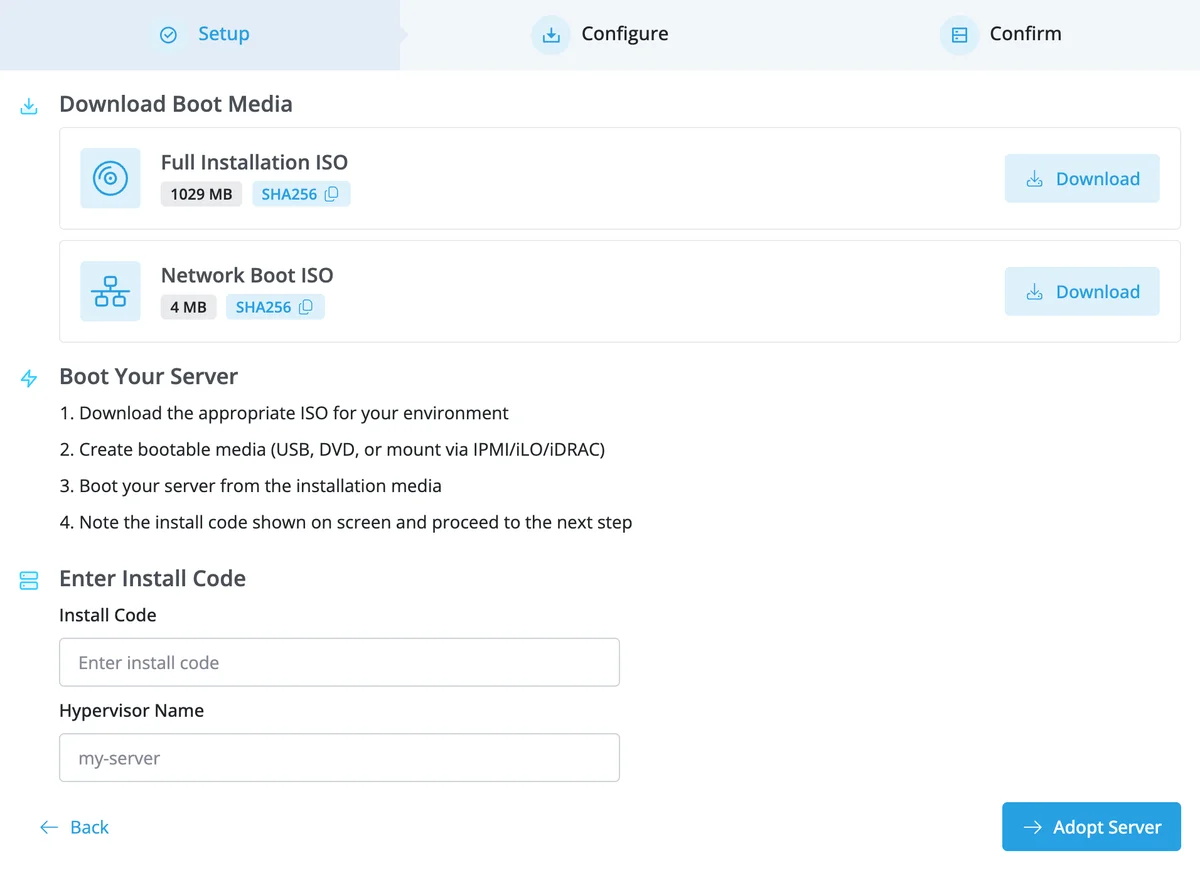
Network Boot ISO (Recommended): A small (~4 MB) iPXE-based image that downloads the latest installer over the network at boot time. This is the recommended option for most users, particularly when mounting media via a remote management interface (iLO, iDRAC, or similar IPMI).
Full Installation ISO: A larger (~1 GB) image that contains that contains the installer. Use this if your server has trouble launching via the Network Boot ISO.
Both Installers require network connectivity to run. Both download the latest version during installation. There is only a minimal bandwidth saving with the Full Installation ISO.
Each download card in the Console shows the file size and a SHA256 checksum. We recommend that you verify the checksum after downloading to confirm the image is intact.
Boot Your Server
- Create bootable media from the downloaded ISO: write it to a USB drive or DVD, or mount it directly via your server's remote management interface (iLO, iDRAC, or similar IPMI virtual media).
- Configure your server to boot from the installation media.
- Power on or reboot the server.
The installer will start automatically. When it's ready, it will display an install code on screen.
Note down the install code. You'll enter it in the Gallium Console in the next step to link this server to your account.
Troubleshooting
If the installer fails to boot or cannot reach the Gallium servers:
- Disable SSL inspection: If your network uses an SSL-inspecting firewall or proxy, the installer will be unable to establish a secure connection. Bypass SSL inspection for the server during installation.
- Check the system clock: An incorrect system clock can cause TLS certificate validation to fail. Ensure the server's BIOS clock is set to the correct date and time.